Settings
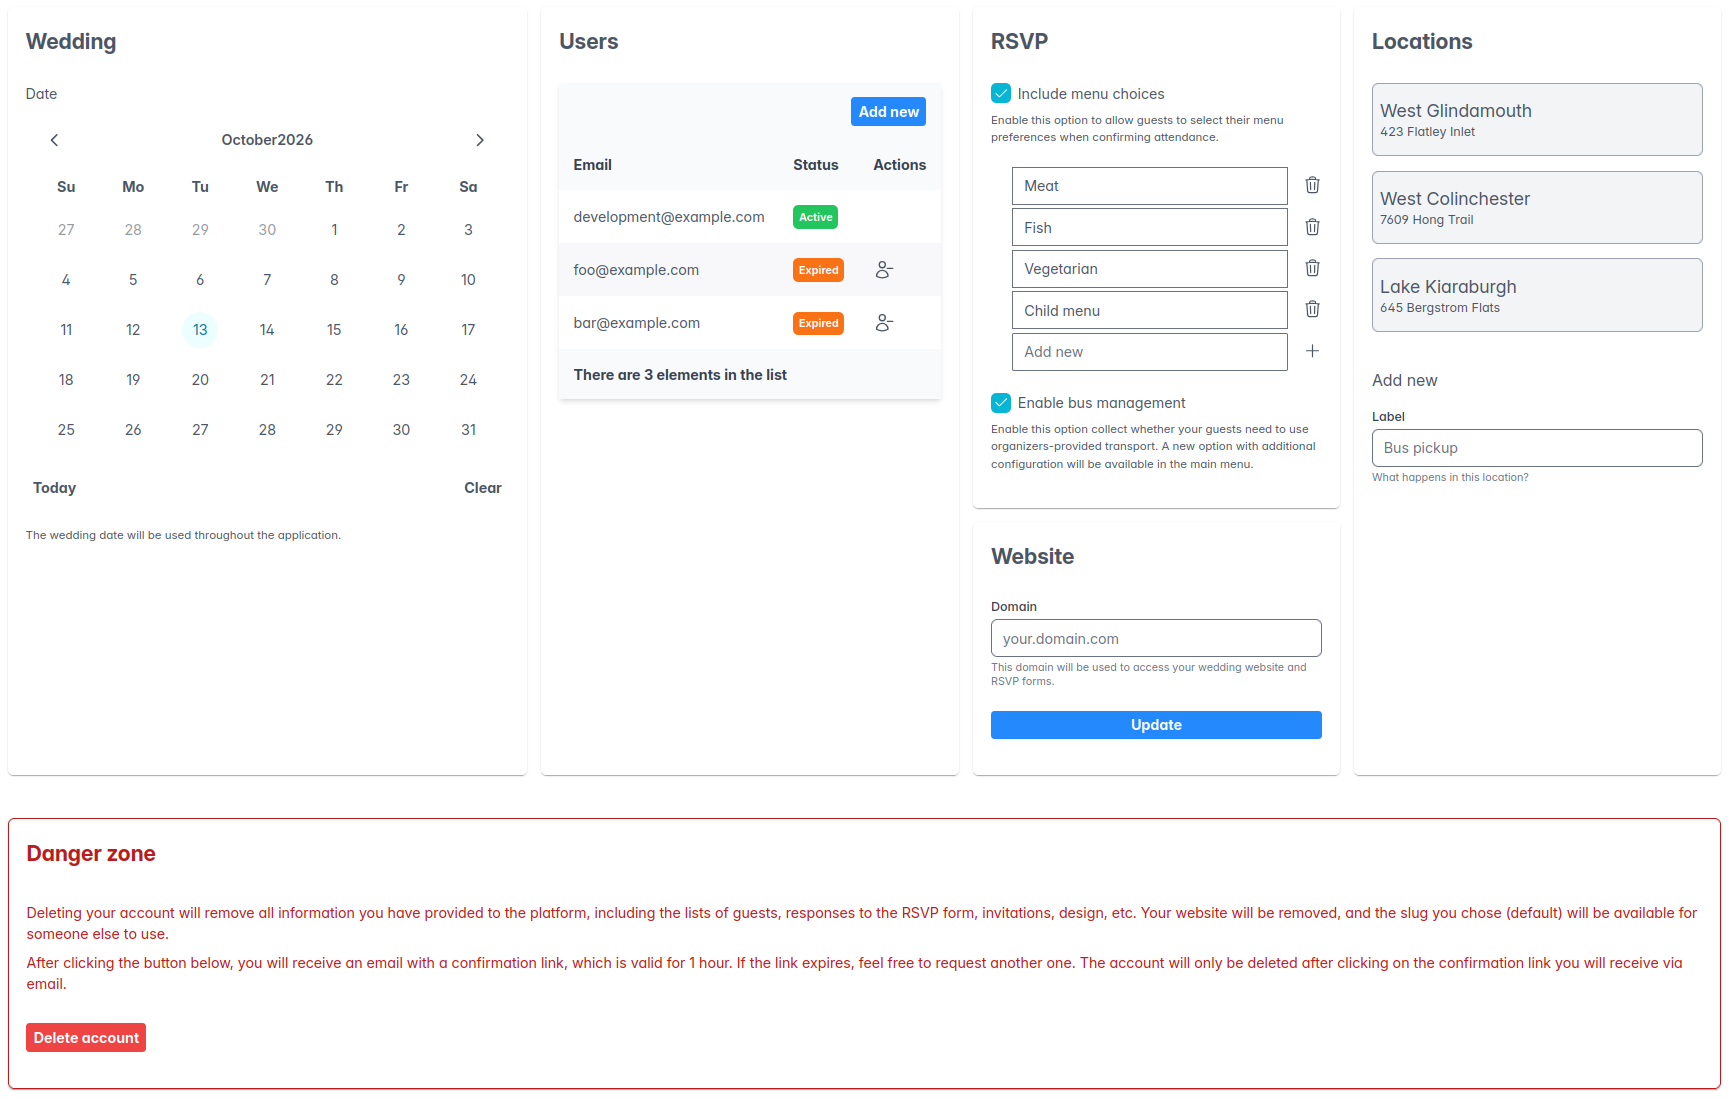
In this section, you will be able to configure different aspects of the behavior of the application.
Wedding date
This optional configuration is used to display the widget in the Summary page.
Users
In this section, you can grant access to other people to manage the wedding. At the moment, all users have full permissions on the platform, so be careful!
After filling the user's email, they will receive:
- An account confirmation email (only if their account didn't exist before in the platform, which is the case unless they have organized other weddings).
- A membership acceptance email, where they accept being part of the team.
After confirming the account and accepting the invitation, they will need to use the reset password flow to set a password for the first time.
RSVP
In this section you can configure the behavior of the RSVP page that will be accessed from the invitation link:
- Include menu choice: enables two additional questions in the form:
- Menu choice (meat, fish, vegetarian, child menu)
- Menu restrictions (allergies, intolerances, restricted ingredients, etc.)
When menu choices are enabled, a list of inputs will be displayed with the default options. You can add, modify, and delete the elements in the list. Keep in mind that the changes will impact guests that have already filled the form (if any). For example, if an option is removed, guests that had chosen it will not have a menu option assigned. If an option is modified, guests that chose the original one will see their choice renamed as well. Therefore, if you're singificantly changing an option, it's better to remove the old one and add a new one.
Website domain
Each wedding has a slug (defined during registration) that identifies their login page and their public website (including the RSVP forms). This piece of configuration allows using a different domain, just for your wedding. For example, say your slug is jane-and-mary and you log in via https://app.libreweddingplanner.org/jane-and-mary/, you may want to use https://janeandmary.us/ (or any other domain) for your website and QR codes. You can do that by configuring your domain in this input.
At this moment, the feature does not provide a full custom-domain experience. Instead, it redirects the user to the internal URL (the one with the slug) when the custom domain is used.
DNS configuration
In order to use your own domain, you will need to follow these steps:
- Acquire your domain in your preferred registrar.
- Configure a
CNAMEDNS record from your domain targettingapp.libreweddingplanner.org(or the domain of your instance, if you're self-hosting). Do not useArecords to target the IP, as it may change without prior notice. - Ask your instance admin to configure your domain in the reverse proxy. This needs to happen only after the previous step has been configured, and right now is a manual step. If you're using the instance at https://app.libreweddingplanner.org, drop us a line.
In order to help you understand whether your DNS configuration is correct, if you have saved a custom domain (and only after that), a success/error message will be displayed below the form input.
Locations
Register the locations that are relevant for the event. At the moment, there is no actual use for it, but we plan to use this information for weather forecast, map widgets in the website, etc.
Danger zone
Use this section to permanently delete your account and all data associated.